Learning to string a guitar is one of those rights of passage that all players go through. If you look around online you're bound to find dozens of different tutorials and methods for how to approach it. The following is simply my way of stringing a guitar that's worked for me for over a decade.
So let's get started.
Our volunteer for this tutorial is a Blueridge BR-60A.

Isn't he brave?
What are you going to need?
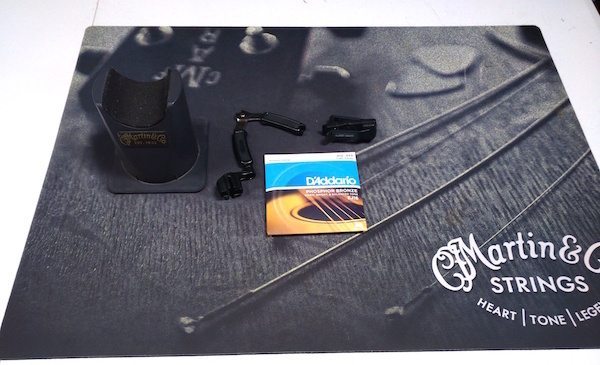
Pictured above are all of the tools I use here in the shop when restringing an instrument.
- A Mat and a Neck Cradle - In the shop we have a designated mat for instrument work as well as a cradle to hold the neck while the guitar rests on it’s back. When doing this at home I will just use two bath towels. Lie one towel across your work surface to prevent the finish from being damaged. Roll the other towel up and place it under the neck for support.
- Wire Cutters and a Bridge Pin Puller. I use the All in One Planet Waves tool personally, but any kind will do.
- A digital guitar tuner
- A pack of strings
Make sure your work surface is sturdy and clear of clutter.
So lets get started...
A word about terminology
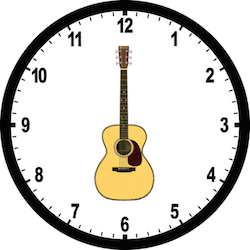
For clarity’s sake in this tutorial rather than using subjective terms like 'left' and 'right', I’m going to refer to direction in terms of the hands on a clock. If the guitar is standing up straight in a stand the headstock will be our 12 o'clock position and the end pin would be the 6 o’clock position.
Removing the strings
So first we have to get the old strings off of your instrument. Some players worry about removing all of the strings from an instrument at once, afraid that it will cause damage to the guitar because of the lack of tension. This risk is exaggerated. While I don't recommend long term storage of an instrument with no strings on it, having them off for a half an hour isn't going to do your guitar any harm.
The first thing to do is to detune your strings until they are completely slack. I then like to take my wire cutters and cut all 6 strings above the soundhole. This leaves me with 12 pieces of string still attached to the guitar, shorter ones going into the bridge and longer ones attached the headstock. While not really necessary this has become a force of habit for me for two reasons. First, I find that having pieces I need to remove from the guitar shorter helps make sure that I don't accidentally scratch the instrument. The other reason is that if you ever find yourself restringing an electric guitar with a strat style bridge, clipping the strings makes it much easier to pull them out of the hole at the back of the instrument.

Next we have to take the pieces off. The longer pieces can be removed by hand but to get the shorter pieces we're going to need to take out the bridge pins.
I really recommend a dedicated bridge pin pulling tool for this job but in a pinch you can use a pair of pliers. If you do go with pliers remember to be extra careful to avoid scratching the bridge or damaging the pins. Slide the mouth of your bridge pin puller over the head of the pin (or grasp the head firmly with your pliers) and up firmly. Repeat until all of the bridge pins are removed.

A piece of advice : As you remove the bridge pins place them somewhere safe like a coffee mug or a dish.
Bridge pins will make a break for it if given the opportunity, ending up on the floor, under furniture, etc.
Don't give them the chance.
Restringing
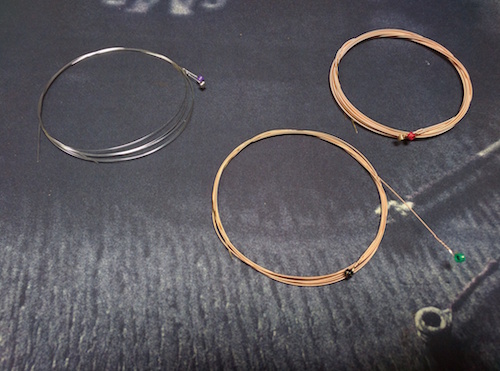
For the BR-60A I'm going to be using D'Addario EJ16 strings, the same ones that came installed on the guitar from the factory. One nice thing about D'Addario strings is that the ball ends of the string are color coated, making it very easy to keep track of which string is which. Other companies use different methods, such as putting different strings in individual paper envelopes. No matter how your brand of string is packaged, make sure not to mix up which strings are which.
So let’s start putting on our first string. Personally I like to install my low and high E strings first, then my A and B, then my G and D. Essentailly I'm starting with the tuning posts closest to the nut and working my way out. I find that this makes it a little bit easier to maneuver around the headstock. If you have a different preference feel free to do what works best for you.
Step 1:
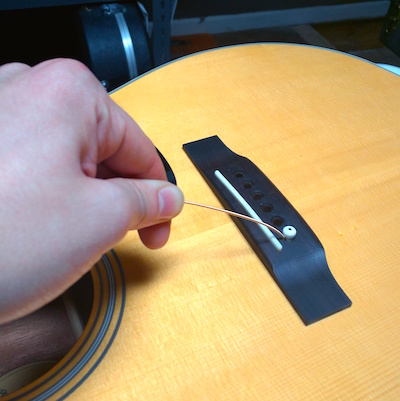
Take the ball end of your string and put it into it’s endpin hole. Then take a bridge pin and insert it into the hole, being careful to make sure the slot of the pin is facing 12 o’clock. The string should run along this slot.
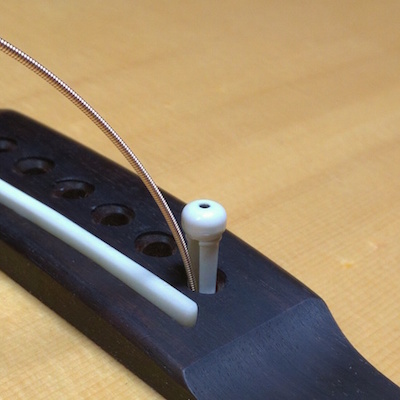
Step 2:
Once the pin is in place, hold it firmly with one hand while tugging the string up with the other. This will help seat the ball end firmly against the bridge plate.
Step 3:
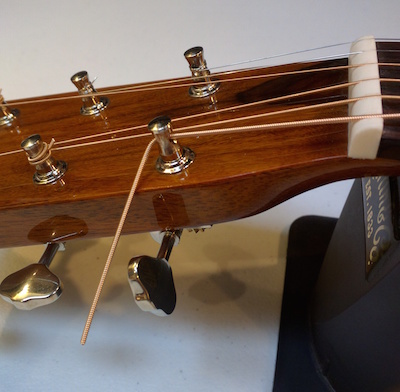
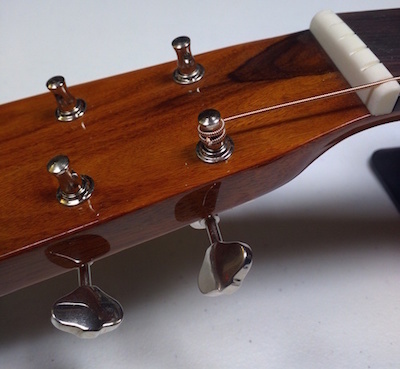
Now let’s move on to the headstock. Turn whichever tuning post you’re using until the hole in the post runs parallel to the direction of the string. Once it is pass your string through the hole and pull it taut. (See below)
Step 4:
Once the string is through the post it’s time to mark how much of it we’re going to need. The way I do this is by pulling the string taut and bending it at a right angle about 1” past the tuning post. What we’re trying to do is make sure the string makes enough wraps around the post to be secure without having so many that we run out of room on the post. Normally you want 3-4 full wraps around the tuning post. I’ve found through trial and error that for most acoustics 1-1.5” is enough.
Once the string is bent, pull the string back through the post until the bend in the string is touching the tuning post. (See below)
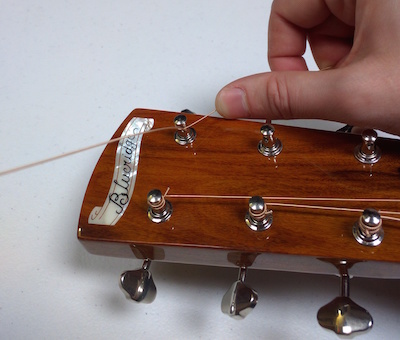
When I originally took the pictures for this tutorial I forgot to take one of the bend being pulled back,
so I went back, removed a string and took a new picture.
This is why the guitar goes from having no strings, to 5, to none again so quickly.
Step 5:
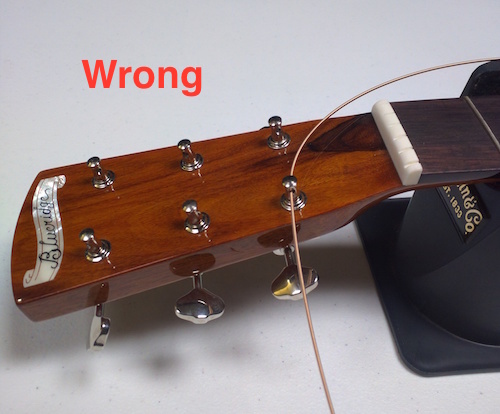
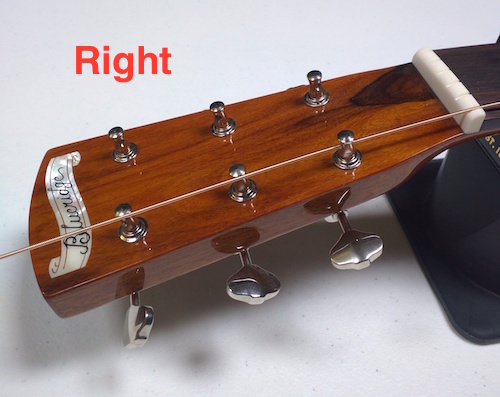
Now it’s time to start wrapping. Keeping the string bend in position with one hand, start turning the tuner knob with the other. The trick during this stage is that we want to trap the excess string between two wraps of the string. Remember to pay attention the string is wrapping around the post. If you’re looking at the face of the headstock, the tuning posts for the Low E, A and D strings should be turning counterclockwise. The High E, B and D strings should turn clockwise.
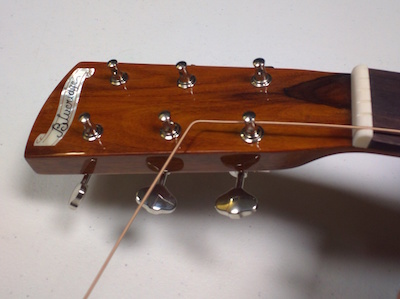
During the first revolution as the excess string starts to cross the proper string make sure it passes below the proper string. (See below)
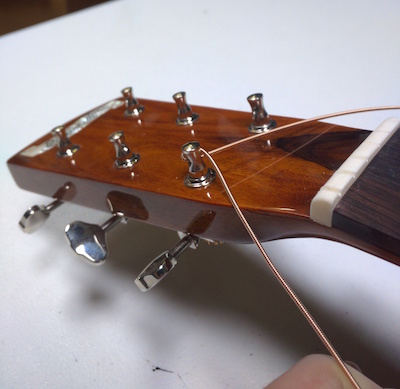
During the second revolution as the excess nears the proper string, make sure it passes above the string. (See below)
What this has done secures the excess string, making sure that it can’t accidentally slip back through the post.
What’s important to remember as you’re wrapping your string around the post is that you need to keep tension on the string. There are a lot of ways to do this, but what I like to do is to use the thumb of whatever hand is guiding the string to apply tension. If you’re tuning the high E, B or G string, you want your thumb to push the string towards the 3 o’clock position and if you’re tuning the low E, A or D strings you’ll want it to push towards the 9 o’clock position. At the same time you're also pulling the string back towards the body of the guitar. This will ensure that the wraps around the post are tight so that you don't have any slipping problems later.
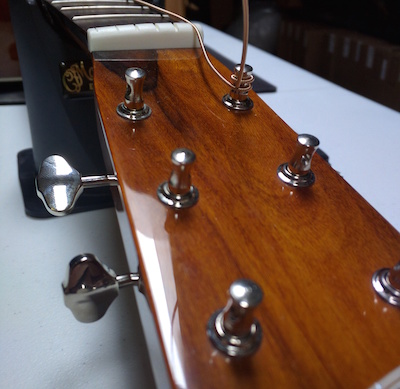
Step 6:
Continue wrapping until the string is taut. At this stage you should not tune the string to pitch. Just get it tight enough to hold itself in place. Once it is you can take your string cutters and snip off the excess.

Repeat Steps 1-6 for the remaining 5 strings. Also, remember to keep track of where string clippings are going. You really don't want to end up with a B string sticking into the bottom of your significant other's foot. Believe me when I tell you that they will not find it even slightly amusing.
Once you're done you tune up your guitar and start playing. Before tuning your strings it pays to stretch them out to help alleviate the tuning problems that fresh strings can cause. I simply grab my strings one at a time at around the 7th fret and gently pull up.
And that's it, you're ready to play.
Have a comment or different way you string your guitar? Leave a comment.